Snappy performance is key to the success of any web application. With that in mind, companies conduct performance testing prior to launching a new website or application to ensure that it performs as planned in various scenarios. There are various performance testing tools available on the market today, and it is important to choose one works well for you.
Apache JMeter is an open source performance testing tool from Apache Software Foundation. Apache JMeter is used to test performance both on static and dynamic resources (files, Servlets, Perl scripts, Java Objects, Data Bases and Queries, FTP Servers and more). Here we will see how to setup Apache JMeter in a Linux environment and will also see how to create test plan.
Steps to setup Apache JMeter in Linux environment:
- Download Java and install: First download and install the latest version of Java SE Development Kit on your machine since JMeter is pure Java based desktop application and requires a fully compliant JVM 6 or higher to execute.
- Download Apache JMeter: After successful installation of Java, you need to Download Apache JMeter.
a. Download latest version of JMeter from http://jmeter.apache.org/download_jmeter.cgi.
b. Select binary file (.tgz) to download
c. After download extract the package at any location in your system. After extracting tgz file you will see JMeter directory structure as shown below:
— /bin: Contains JMeter script file to start JMeter
— /docs: JMeter documentation files
— /extras: ant related extra files
— /lib/: Contains the required Java library for JMeter and JDBC drivers
— /lib/ext: contains the core jar files for JMeter and the protocols. Also contains plug-in jars
— /lib/junit: JUnit library used for JMeter
- Add some standard plug-ins: You may need to install some plug-ins. This will help you in using additional features of JMeter.
a. Download standard set of plugins from http://jmeter-plugins.org/.
b. Extract the downloaded package
c. Copy the jar files from /lib/ext/ folder to /JMETER_HOME/lib/ext/ folder of JMeter
- JDBC Configuartion in test: If you use JDBC configuration in your tests then you need to put JDBC driver’s jar file of your database in /JMETER_HOME/lib/ directory.
- Memory Assignment: You need to do proper memory assignment before running Jmeter. Edit the memory settings in file JMETER_HOME/bin/jmeter. Set the values against the HEAP, NEW and PERM config variables.
- Launching JMeter
a. GUI Mode: For running JMeter in GUI mode, go to JMETER_HOME/bin directory and run ./jmeter.sh command from console. This will open JMeter graphical interface. Closing the console closes the JMeter GUI as well. GUI is more helpful in creating and debugging test plans. This mode is also very useful for analysing the results using reports and graphs available in Jmeter.
b. Non GUI Mode: JMeter GUI mode consumes more computer memory so to run the test plan for long time periods please use its non GUI mode. For running JMeter from non GUI, you can run following command from console using screen utility. screen jmeter -n -t test.jmx -l log.csv
— screen: It is used to run test plan in screen utility so that plan can be resumed in case of network issues.
— jmeter -n: Used to run JMeter in non GUI mode
— –t test.jmx: Specified file name containing test script
— -l log.csv : Specified log file name which stores logging information
Elements of JMeter
Below are some basic elements of JMeter Test Plan:
- Thread Group
- Samplers
- Listeners
- Assertions
- HTTP Defaults
Thread Group
- a group of instructions or actions representing one “actor” using your application
- always processes instructions within them in chronological order
- allows you to specify simultaneous testing scenarios
Samplers
- Only within a Thread Group
- Samplers perform the actual work of JMeter
- Each sampler (except Test Action) generates one or more sample results
- The sample results can be viewed in listeners
Listeners
- Report back test results to you (in GUI or save them to a file)
- Listeners can work in real time or use saved results
Assertions
- These are criteria you can set to which the test must meet in order to pass
- Eg. Results of a samplers should not contain “Critical Error” phrase
Create an example Test Plan with JMeter GUI
You can use GUI mode to prepare your test. Start the JMeter in GUI mode to prepare test.
1. Define Use Case: Before writing test script, you need to define the use case of test
For example: – User hits the main page of the application
– Clicks on contact-us link
– Completes the contact-us form and submits
2. Implement JMeter scripts
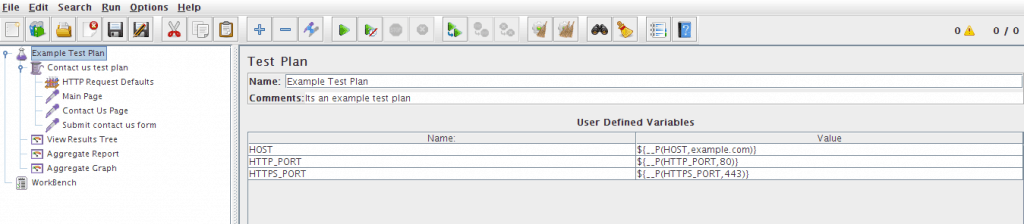
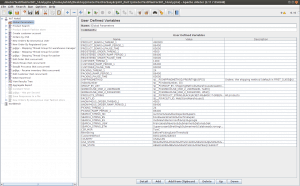
– Create a test plan and set UserDefined variables for Host and port entries
– Add a Thread Group with number of Threads and Ramp-up Period
– Add HTTP Request Defaults with
– Add HTTP Request as per use case
– Run the test
Below is the screenshot of an example test plan defined above.

Screen shot of test plan to show Form submit with parameters.

3. Analyze the results: For analyzing results, we can add some listener like:
— View Results Tree
— Agregate Report
— Agregate Graph
So there you have it! Those are the basics. For additional information, please tale a look at the reference links below. Good luck and happy testing!
Reference links
http://www.guru99.com/guide-to-install-jmeter.html
You tube video
http://jmeter-plugins.org/
http://training-course-material.com/training/JMeter_Fundamentals
http://www.roseindia.net/jmeter/using-jmeter.shtml